








| |
| | |
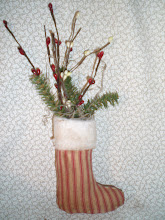
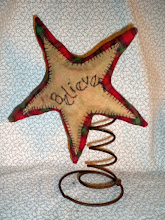
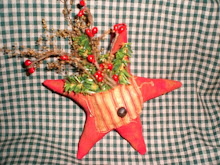
| For this project you will need: - Cardboard boxes | |
Instructions: 1. Cut different Christmas shapes out of the cardboard box.2. Following the method below for stitching on cards, stitch around the shape with the yarn. Leave a longer piece for hanging and tie it off into a loop. 3. Tear out a small piece of fabric and glue it to the center of the shape. Repeat for the back side of the shape. 4. Glue a button on the fabric to embellish it. Repeat on the back side of the fabric. For stitching on cardboard see: http://www.craftideas.info/html/stitching_on_cards.html Merry Christmas Barb
|
Thursday, July 30, 2009
A star made with cardboard


Monday, July 27, 2009
The wonderful scent of Gingerbread

Years ago, in the land before time, I was on a college choir tour. We gave a concert in a remote part of western Nebraska, during a very harsh winter. After the concert, we were divided up into groups of three or four students and went to host homes. For my group the ride to the house was long and cold. The winds were howling and the snow was blowing across the road and the visibility was nearly zero.
We finally got the the remote farmhouse, and when we walked in, we were greeted with warm gingerbread cake with lemon sauce. It has been so many years, and I still remember that home and the thoughtful people who made us welcome on a very cold night.
There's always a place for gingerbread. These ornies are available at:
http://prairieharvestarts.com/shop/ornies/ornies-winter-christmas/primitive-folk-art-gingerbread-men-ornies-w/-rusty-bell-buttons-set-of-4/prod_28.html
Looking forward to that wonderful time of year.
Hugs Barb
Thursday, July 2, 2009
And the winner is..........
First, thank you everyone who entered this give away! I truly appreciate it. I wish everyone could win, but sadly only one. Please return often for more give aways and contests. More in the works.....
My son pulled the name from a wooden bowl as I didn't want to do it myself. I just felt better that way.
The winner is Keepsake Korner!!!!
Please send me your address and they will be on their way to you!!!!!!!
There will be a new something or other starting soon!!!!!!!
See you soon!
Hugs, Barb
My son pulled the name from a wooden bowl as I didn't want to do it myself. I just felt better that way.
The winner is Keepsake Korner!!!!
Please send me your address and they will be on their way to you!!!!!!!
There will be a new something or other starting soon!!!!!!!
See you soon!
Hugs, Barb
Tuesday, June 30, 2009
Last Chance to enter the give away!!!!!!
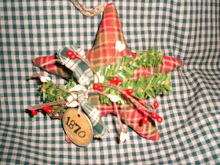
Today is the last day to enter the give away for the Christmas Stars. Become a follower today!
WINNER WILL BE ANNOUNCED TOMORROW!!!!!!!
How many days till Christmas????
Barb
WINNER WILL BE ANNOUNCED TOMORROW!!!!!!!
How many days till Christmas????
Barb
Wednesday, June 24, 2009
Still time for enter the Giveaway!!!!!!!

A reminder:
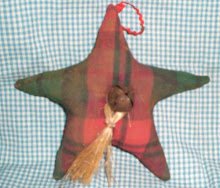
To celebrate the opening of this Christmas blog, I am giving away a set of these stars. These were among the ornies that decorated the front cover of last year's Country Sampler Magazine.
To be eligible, you must become a follower of this blog. Winner will be drawn randomly from that list on the last day of the month.
Happy Monday and how many days till Christmas?
Barb
Wednesday, June 17, 2009
Reindeer candy pot for kids to make

These whimsical little reindeer can serve as place card holders
for a holiday table, party favors, or give a large reindeer as a gift,
filled with the recipients favorite candy!
They are an easy and inexpensive craft for classrooms or scout troops.
You'll Need:
Scissors
Craft glue, glue stick or glue dots
Terracotta clay pots; 2"-5"
Plastic eyes
Red pom-poms (glitter pom-poms are a fun addition!)
Three shades of brown craft foam, cardstock paper or construction paper;
we combined all three to make our reindeer family.

parts pictured for the large reindeer
2 antlers
2 large ears
2 small ears
2 eyes
one red nose
How to Make It:
First, with one shade of brown, cut the antlers to match the size of
your pot. If you are making the larger reindeer, use a child's handprint as pattern. Then, cut the ears with the other brown. We used a lighter shade of brown to add yet another layer to the ears but that's not necessary.
Attach they ears to the back of the pot. Then add the antlers.
Glue the eyes and nose the front. Fill the pot with candy, nuts or other goodies. It's that simple!

as seen on http://www.amazingmoms.com/htm/christmas-crafts-for-kids-reindeer-pots.htm
Christmas is coming sooner than you think!!!
Hugs,
Barb
Tuesday, June 16, 2009
Fun recipe for Snowman cupcakes!!!!
 Saw these and had to share with you!!!! This would be fun to do with the kids, 4H, Girl Scouts and Cub Scouts or just on some cold, windy night when the family could use a little fun.
RECIPE INGREDIENTS: | |
 | Cooled cupcake (baked from your favorite recipe) |
| White icing |
| Large marshmallows |
| Waxed paper |
| Pretzel sticks |
| Decorators' gel |
| Orange slice candy |
| Junior Mints |
| Thin Mints |
| Fruit leather |
2. Flatten a large marshmallow on waxed paper with the palm of your hand. Cut a second marshmallow in half horizontally, then stack the halves on the first marshmallow to form a torso and head.
3. Push a thin pretzel stick down through the snowman (this will help him stand up), then set him on the cupcake.
4. Use decorators' gel to create a mouth, eyes, and buttons, then add pretzel stick arms and a wedge cut from an orange slice candy for a nose.
5. Accessorize with a candy hat (a Junior Mint secured to a Thin Mint with icing) and a fruit leather scarf.
Subscribe to:
Posts (Atom)